How to grow a violet from a leaf at home
Content:
- Violet breeding methods: pros and cons
- Rooting a violet leaf in water
- How to grow a violet from a leaf at home in agroperlite
- Reproduction of violets with a leaf at home step by step
- How to propagate a violet with a peduncle
- Typical germination errors
- Violet transplant after germination
- Reproduction of violets by seeds
Having even one plant of a room violet, over time, the florist asks the question: how to propagate it, because breeding is so interesting. Any plant loses its former beauty with age, but it is so nice to admire the delicate flowers of a favorite variety every year. Knowing how violets breed, getting a new outlet is a snap.
Violet breeding methods: pros and cons
Depending on the experience in breeding Saintpaulias, everyone can choose the method that suits him. It is useful to know all of them, because sometimes there is no choice at all, depending on the state of the mother plant.
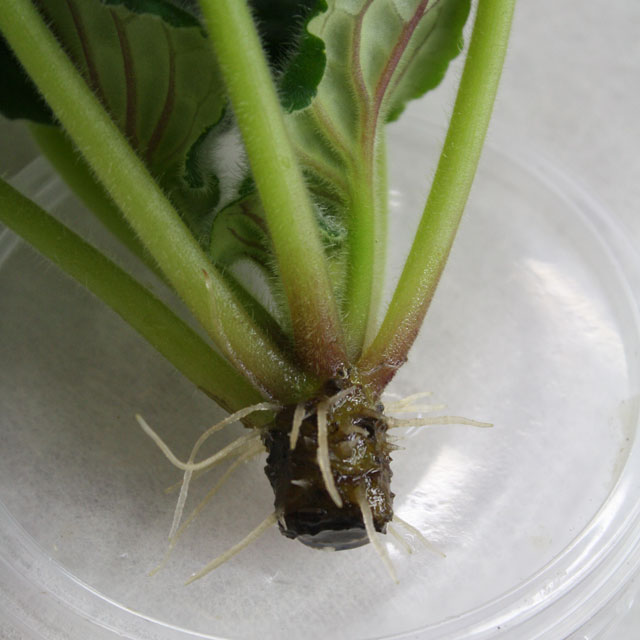
Rooted Saintpaulia leaf with babies
Leaflets
Any strong leaf without traces of disease and spoilage can become an excellent material for vegetative propagation of the Saintpaulia rosette. The optimal time is March, when there is no heat, and the day is lengthening. But as a measure of emergency rescue, the method can be used almost all year round.
Pros:
- material is always at hand;
- a large output of children: from one sheet to several dozen outlets;
- almost guaranteed result if simple rules are followed;
- can be carried out all year round.
Minuses:
- rooting in March gives the best results;
- violation of the containment regime will lead to the death of both the sheet and the children;
- the minimum time for receiving children is two months.
Having gained experience on how to plant violets in a pot with a leaf, in the future you can repeat it as many times as you like, noticing additional nuances.
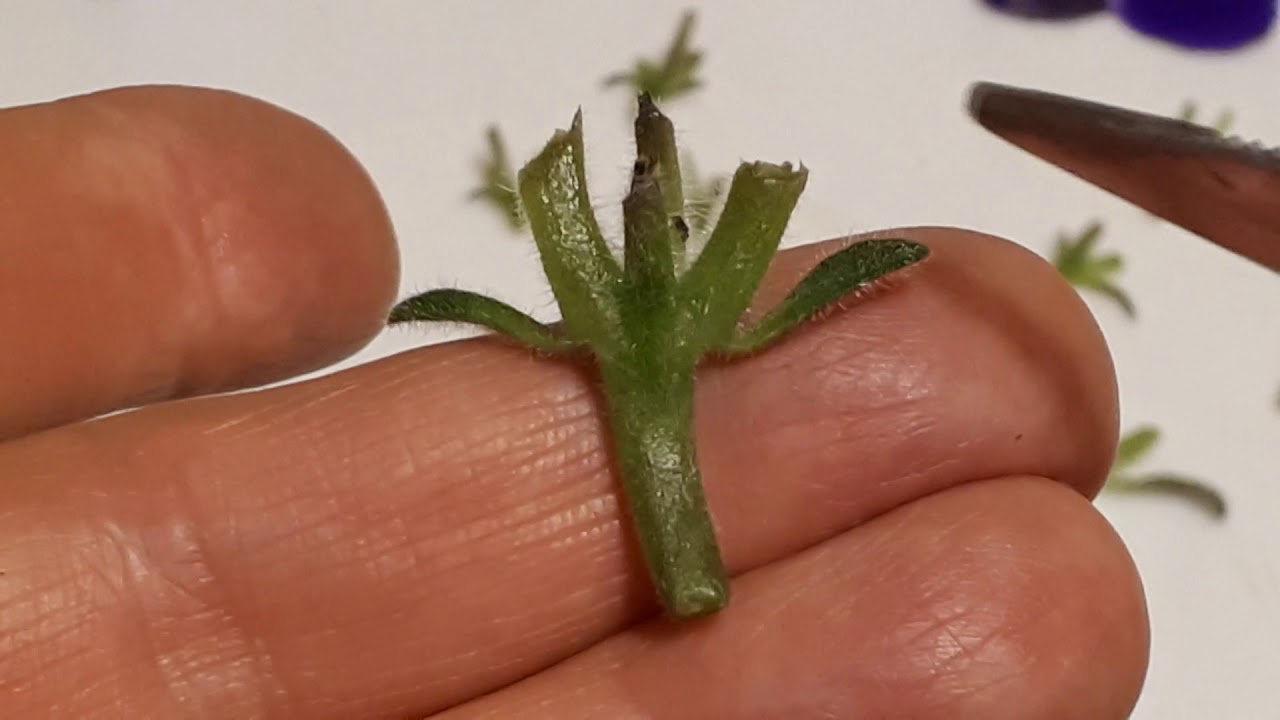
Cuttings, parts of the stem
This type of reproduction is practically no different from leaf and is used when there is no whole and strong leaf on the plant. Therefore, take a leaf cutting with a piece of the main vein or cut out the central part of the stem. The longer the stalk, the better. A part of the stem is taken 1-1.5 cm long from the center, removing the crown (if it is in poor condition), as well as the entire lower part with roots.
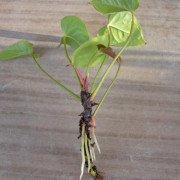
Part of a violet stem with a crown and young roots
The planting material is buried 1-1.5 cm into the ground and covered with a transparent cap. In such a greenhouse, in the next 2-3 weeks, viable parts of the violet will be able to give roots. If you take a container with transparent walls for landing, then soon the roots will be clearly distinguishable. Part of the stem, like the stalk, should give children, which in 2-3 months can be carefully planted in separate pots.
Advantage: Larger parts have more vitality for growing young roots. Disadvantage: in the presence of some kind of fungal disease, there is practically no chance of rooting.
Peduncle
Some varieties of violets, for example, chimeras, can only be diluted in larger quantities.Seeds and leaves do not carry a complete set of genes that can preserve the unique shade of flowers and their shape, as well as leaves. To obtain clones, peduncles are taken, rooting them in the same way as the leaves.
Rooted part of the peduncle
Advantage of the method: 100% preservation of all the characteristics of a rare variety.
Disadvantage: extreme meticulousness of the technique and low survival rate of peduncles (on average, 1 out of 4-5 or less).
Seeds
Violet seeds are very small and difficult to handle. They are practically not found on sale. Main reason: short germination period (up to four months). Therefore, the method is used exclusively by those who are purposefully engaged in the development of new varieties. Plus: you can get new shades of flowers by crossing violets with different traits.
Rooting a violet leaf in water
You can root in soil (2-3 weeks) or in water (about four weeks). Babies appear within 1-3 months after rooting. To maintain optimal humidity, a glass with a leaf is kept under a hood or in a greenhouse.
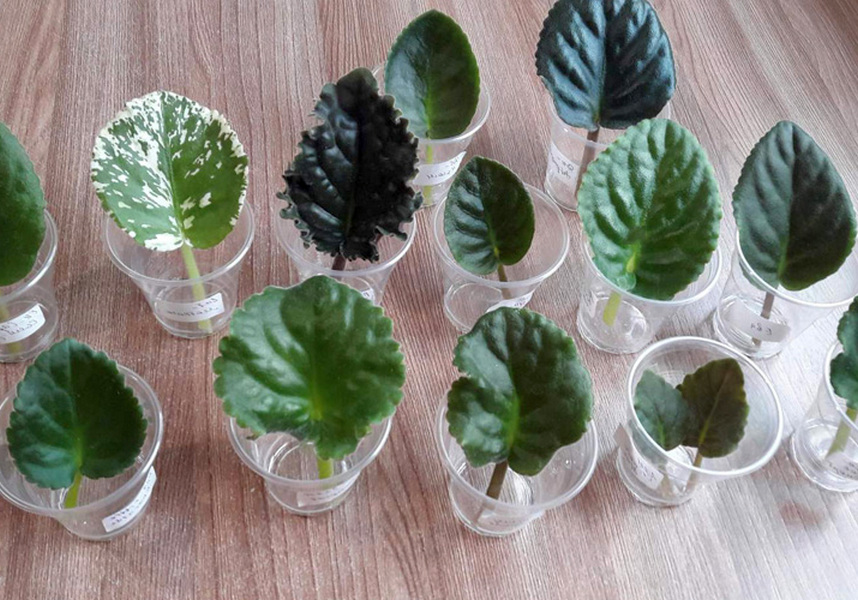
Rooting violets in water
How to root a violet from a leaf: preparation for germination
If the leaf has been lying for a long time (more than 5 hours), then it should be allowed to be saturated with water with a drop of potassium permanganate (2-3 hours). It is best to use leaves of 2-3 tiers of a rosette for reproduction. The stalk is left up to 2 cm long. If part of the leaf is used, then the cut is given 15 minutes. dry, immediately rubbing with alcohol.
Optimal conditions
It is best to use a transparent plastic greenhouse with a lid. Once a day, the lid is opened for ventilation. If there are traces of damage on the sheet, then the lid is not covered. Additional lighting is not needed if you start work in the spring or summer.
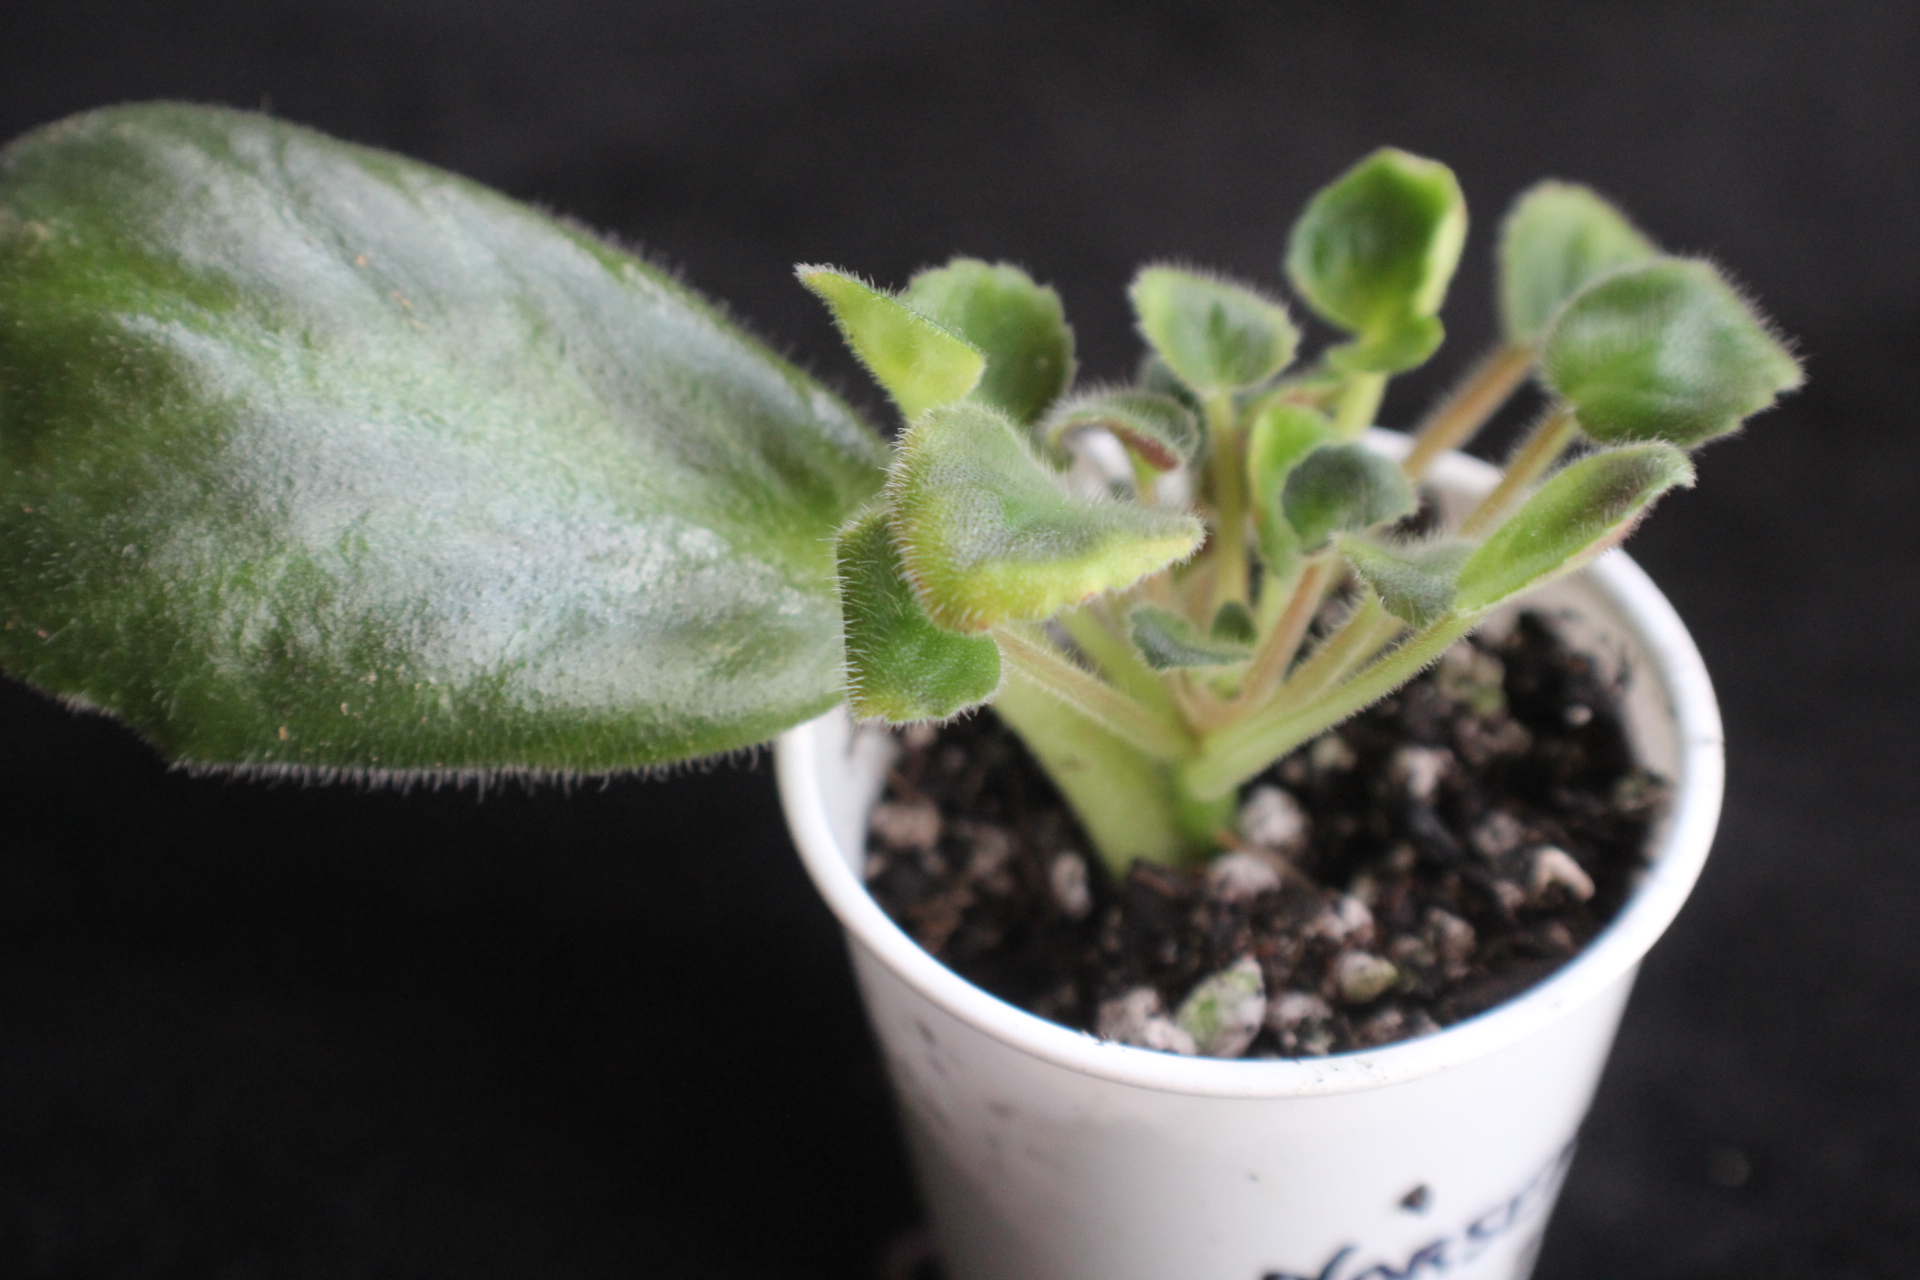
How to grow a violet from a leaf at home in agroperlite
This relatively new method has several important advantages over water rooting. In agroperlite, the roots grow in the same way as in the soil, which simplifies the adaptation process when transplanting into the ground. Agroperlite is sterile, breathable, and retains moisture well. It can be used solo or mixed with vermiculite and peat. The stalk, on average, sprouts after three weeks, after which it is 100% ready to plant it in the soil.
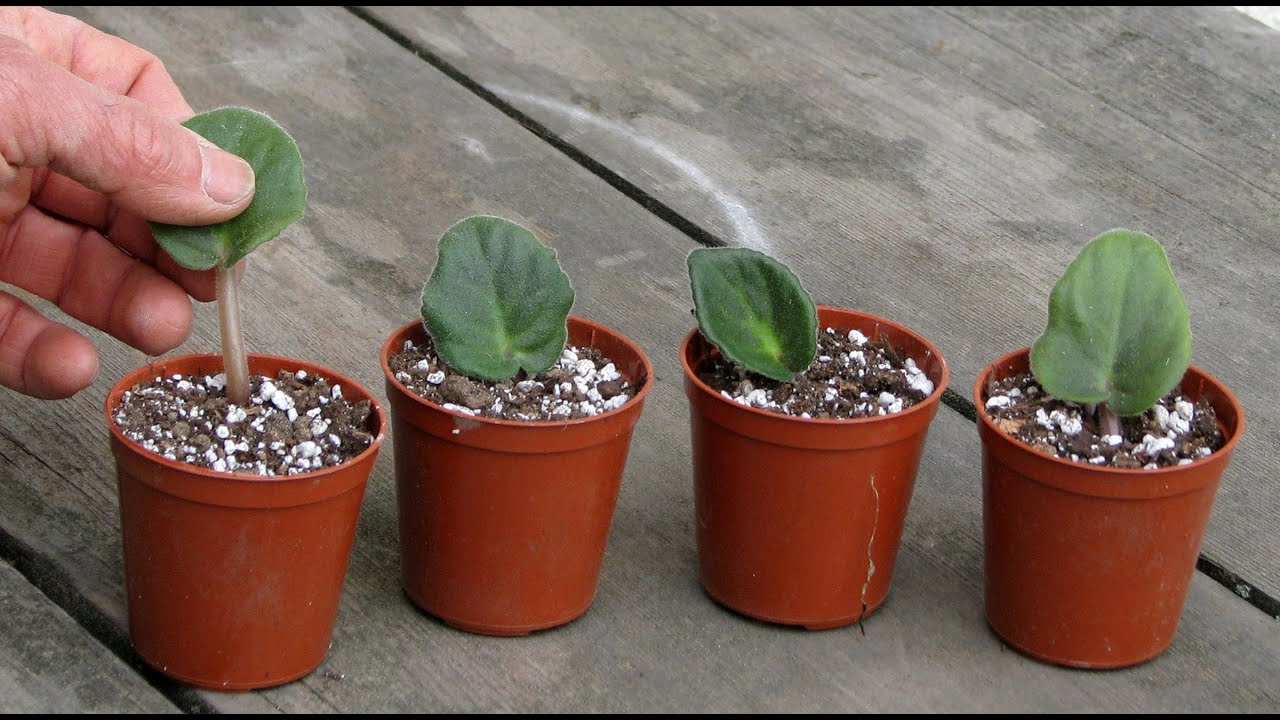
Germination of violets in agroperlite
Reproduction of violets with a leaf at home step by step
You can easily immerse a freshly cut leaf in the soil, no preparation is required, it is only important to create suitable conditions for growing roots. Using the root will speed up the process, but even without it, the chances of rooting are high.
The soil
In a glass (5 cm in diameter), drainage (sand, fine expanded clay) must be placed on the bottom, and holes are made for water drainage, through which it is best to water. The correct soil for rooting is bought in the store or prepared by themselves, mixing vermiculite and perlite, peat, finely crushed charcoal with fertile soil. The share of baking powder is up to 30-50%. Optimal acidity pH = 5.5-6.5.
Temperature, humidity, lighting
Violets can grow well in a temperature range of 14 ° C to 29 ° C. For adult plants, a mode of 20-22 ° C is suitable, and for rooted cuttings - 24-26 ° C. A jump of more than 3 ° C per day already slows down development, and more than 6 ° C will make it freeze for a long time. Violets love humid air (above 60%), but react poorly to water droplets on leaves and flowers. It is optimal to put the pot in an additional second tray filled with water, and keep the first one dry after watering.
Saintpaulia's light is bright, but diffused on the east and west windows, or in the shade of taller plants.
Soil quality for planting a leaf
To obtain the soil of the desired looseness and structure, components are introduced into it that increase the air capacity and the ability to retain moisture: vermiculite, perlite, charcoal, sand, sphagnum moss. All of them do not disturb the acid balance and do not change the bacterial composition for the worse.
How to propagate a violet with a peduncle
As soon as the peduncle grows to its maximum height, and its buds open, the flowers are carefully cut. The peduncle itself is cut as close as possible to the point of its growth from the outlet. There should be a fork with 2-3 green leaves. The lower end is immersed in soil for violets and must be covered with a transparent cap on top, leaving in a warm place (20-22 ° C). Water the pot from a pipette very rarely and carefully, since waterlogging is detrimental to the peduncle and its roots. Rooting takes 2-3 months.
Typical germination errors
A negative result is more often the case with the first attempts to breed Saintpaulia. Reasons for failure:
- Leaf decay. Most often it happens due to waterlogging, especially in winter. To accelerate rooting, the cut is dipped into the root before immersion in the soil.
- Water in rooting cups is disinfected with activated carbon.
- The rooted leaf became lethargic. It should be placed in a greenhouse and reduced for the duration of watering.
- The leaf turned black. This is due to excess moisture and sunburn. The pot must be removed to a greenhouse away from direct sun and dried.
Violet transplant after germination
As soon as the sockets of the children are formed, they are carefully separated and transplanted into new containers. The optimal time is autumn (September-October). Winter is the most inappropriate period. The next time the pot is changed will be in the spring (February-March).
How to determine the readiness of a plant for transplantation
The signal for replanting is the filling of the pot with roots, as well as a white coating on the soil surface - mineral sediment. If the roots support the walls of the pot, look out of the lower drainage holes, this is already a neglected case, a transplant is required urgently. The goal is to change the soil to a new one, rich in nutrients. New roots grow from the part of the stem that is above the soil. Therefore, the plant is freed from the old lower leaves (if necessary), and the stem is slightly deepened.
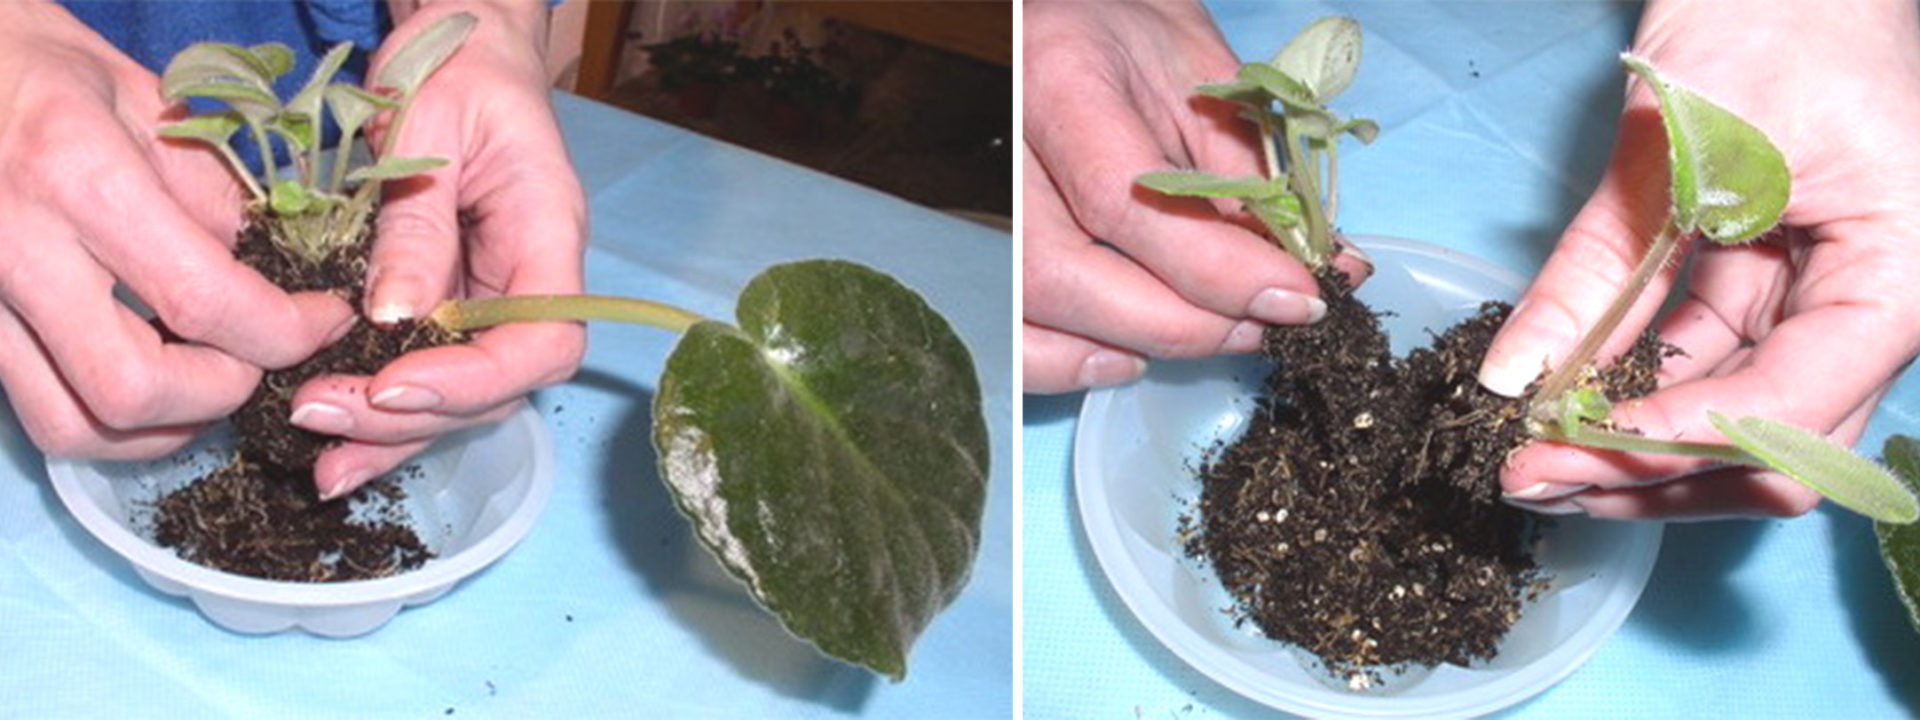
Children are separated from each other
How to choose and prepare the soil for planting
The soil is suitable with acidity pH = 5.5-6.5. When choosing a ready-made substrate in a store, preference is given not to black, but to brown, rich in large-fiber high-moor peat, soil. Various disintegrants are mixed into it by a third of the volume: sand, charcoal, vermiculite, coconut fiber, perlite, sphagnum moss.
Humidity, temperature, lighting
After waiting for the soil to dry, the violet is taken out of the old pot, gently shaken off the old soil. Long, old and rotten roots are removed. The bottom row of leaves is pinched off if it looks unattractive, given that this will postpone flowering for at least a month.
The first two days after transplanting, watering is not performed in order to give time to heal the injuries of the roots. The pot is placed in a warm place (23-25 ° C). If the air is very dry (humidity 50% or less), then a greenhouse is used.
Reproduction of violets by seeds
If a collector is lucky enough to find Saintpaulia seeds on sale, then it is not too difficult to grow varietal plants from them at home.
What growable seeds look like
It is visually impossible to distinguish viable seeds from non-viable ones, they are too small. Their color ranges from black to dark brown. The only guideline for germination is the supplier's production date.
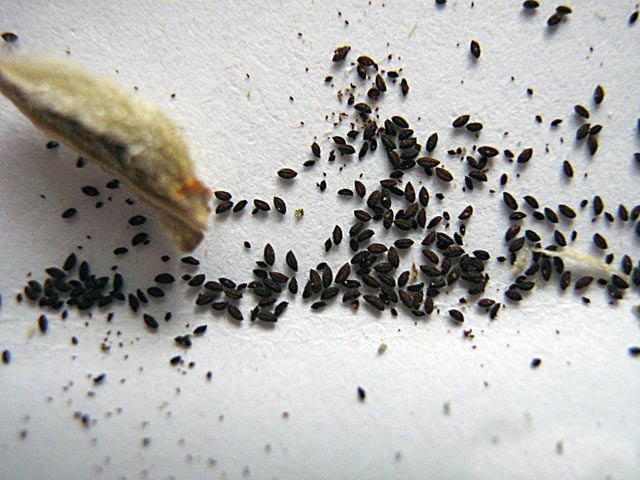
Saintpaulia seeds
How to prepare seeds for planting in soil
To distribute the seeds over the soil surface, they are coated. Take a few activated charcoal tablets and crush them into dust. Then coal and seeds are mixed. Dropping a few drops of water into the mixture, mix gently. You should get small lumps - pills with seeds inside.
Optimal conditions for seed germination
The decisive factor is temperature. At 20 ° C, seedlings will appear in three weeks, and at 25 ° C in two weeks. Sowing is carried out in a container along the soil surface, practically without deepening (you can slightly powder it with fine clean sand). Moistened with a spray bottle, and then covered with a transparent lid or glass. The place is chosen bright, but without direct sun, slightly shaded.

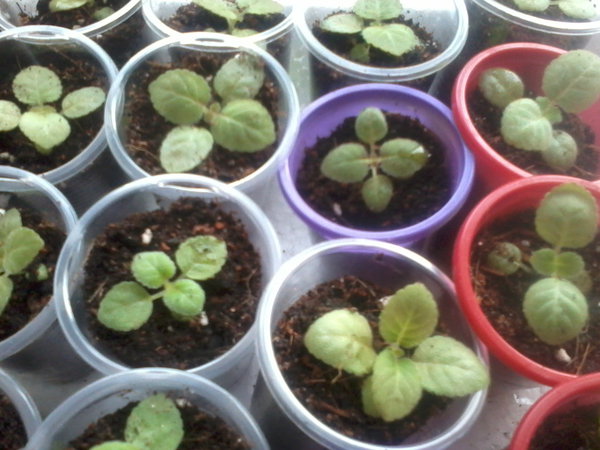
Seedlings of Saintpaulia
Rules for the care of young sprouts
In order for the seedlings to grow, but not stretch out, the temperature must be lowered to 17-18 ° C. Watering is carried out so that the soil is slightly damp, but not damp. Waterlogging can destroy all seedlings. Dive when forming the first true leaf into a larger container. After another 10 days, you can plant it in the first smallest pots (5-7 cm in diameter).
Saintpaulia seedlings picking
Growing Saintpaulias at home is a very exciting process, fraught with a lot of interesting nuances. It may seem difficult, but the experience of how to propagate violets in different ways comes quickly, and the results are definitely worth the effort.